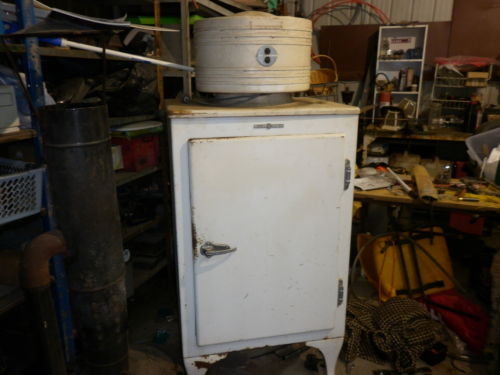
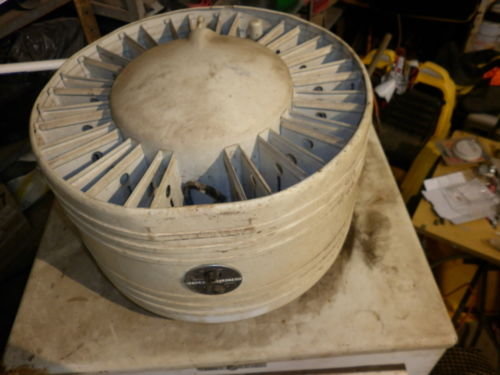
CA-2-B15 at the residence of the previous owner.
2.1 My 1934 CA-2-B15
A non functioning CA turned up on eBay in late January 2012, and was
acquired for $150. Undoubtedly, because it was out of refrigerant,
and that it used Methyl Formate, there were no other bidders.
CA-2-B15 at the residence of the previous owner.
Collecting the unit showed just how heavy they are. The cooling unit
and cabinet are roughly 60-70kg each. An engine hoist was used to lift
off the cooling unit.
The owner had stated that it used to work really well, then there
was a funny smell and it stopped cooling. My thoughts were that I would
repair the leak and refill with a modern refrigerant.
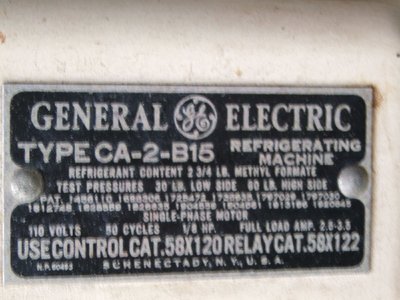
Label on starting relay enclosure gives much useful information.
It can be seen from the model number that it was the larger (size 2)
fridge (the size 1 type was often called apartment size), form B (1934
production), and for 50 cycle operation. Unlike the DR and CK types, there
was not a size 3 for the CA. The X-7-B cabinet type indicates 7 cu.
ft. capacity.
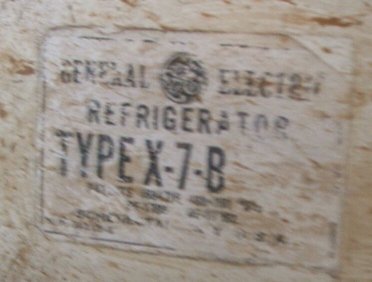
Label underneath cabinet. As cooling units are interchangeable,
cabinets are treated as a separate item and have different model numbers.
Unusually, for a Monitor Top in Australia, there was no step down transformer
attached to the bottom of the cabinet, and it didnt look like there ever
had been. Instead, the owner had been using a stand alone 240-120V transformer
which was extremely heavy, and very much overkill being rated at 2KVA.
Much to my horror, ordinary 240V plugs and sockets had been used to connect
the fridge to the transformer. Hopefully, it had never been plugged into
240V. The power cord had been replaced in recent times with plastic two
core flex. Despite the power cord being connected by a plug and socket
to the cooling unit and cabinet, the owner had cut the cord at these points.
2.2 Examining the damage.
First impressions were that one of the previous owners had been very
careless when moving the fridge. Immediately obvious was a very sharp kink
in the high side tube to the evaporator. It looked like the cooling unit
had been lowered onto the cabinet top without making sure the tube was
clear.
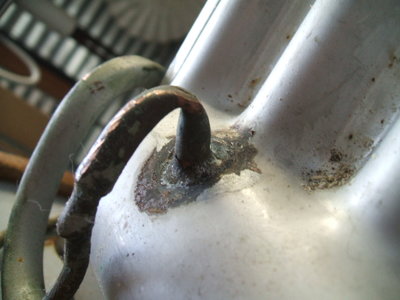
High side tube entry into evaporator had been kinked and squashed.
At this point it was assumed this was where the leak was, especially
as there was some grazing on the copper tube around the damaged area. The
cabinet top seals had not been put in position correctly when the cabinet
top was lowered, resulting in them being crushed in the wrong position.
And, the cooling unit had been dropped on its side resulting in a dent
at the top of the condenser.
Cooling unit had been dropped on its side resulting in this dent
in the condenser.
It was also clear that the original wiring would need replacement, for
the insulation had hardened and would break when moved. In fact, someone
had already wrapped in tape the wiring in the motor start relay box.
However, to gain proper access to the wiring, it was obvious the cabinet
top plate would have to come off, which in turn would necessitate removing
the evaporator. Given there was no refrigerant to be lost this did not
seem to be a problem.
3.1 What to do about refrigerant.
With a rough plan decided on; i.e. remove evaporator, rewire the unit, and repair the high side tube, the question of refrigerant was the most important thing left to decide on. This being my first experience not just with a Monitor Top, but also refrigeration, and having read numerous comments on the internet, I had simply assumed that Methyl Formate was not available. Upon learning the difference between low pressure refrigeration and the more common high pressure kind, it became clear that choice of refrigerant would be important. Modern refrigerants such as R12, R134a, and R22, would overload the compressor, and even if the compressor could function, the pressure ratings for the system were inadequate. The CA high side test pressure is only 60psi, whereas for R12 and the like, 250psi is typical.
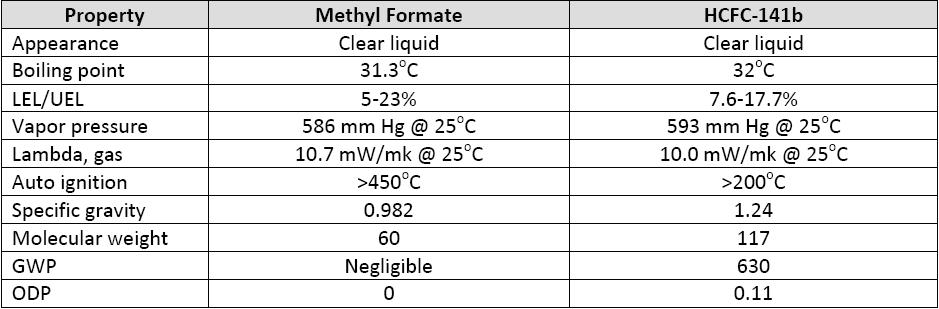
3.2 Alternative Refrigerants.
Becoming popular as an R12 replacement is R600a, which is an isobutane
type of gas. It is not only environmentally friendly, but cheaper, and
close to twice as efficient.
Further research found that there was actually a modern low pressure
refrigerant, R11, and its non ozone depleting replacement, R123. Another
possible option was HCFC-141b. For hydrocarbon replacements there is R601a
(Isopentane). These are fairly close to Methyl Formate in regards to refrigeration
characteristics.
By this time I discovered that Methyl Formate was actually available, despite the many contrary comments on the internet. This was fortunate because not only would I know the cooling unit would work as is, the practical realities, and expense would make it difficult acquiring any of the modern equivalents. Refrigerants such as R11 and R123 are restricted to those holding a refrigerant purchasing licence, and R601a was only available in a 200kg quantity.
3.3 Obtaining Methyl Formate.
It was suggested that Sigma Aldrich could supply Methyl Formate, and
a check of their online catalogue confirmed this. They also had branches
in Australia, and one could order online and have it delivered. To purchase
from Sigma Aldrich requires setting up an account and obtaining approval.
This is understandable given the hazardous chemicals they have available.
Subsequently, I was required to answer a few questions as to the use
of the product. In this regard I explained it was for a low pressure rotary
chilling unit. The fact I worked for an educational institution no doubt
helped, and I was now approved.
Knowing that 2.75lbs was required for my cooling unit, I ordered two
one litre bottles, costing $128 each.
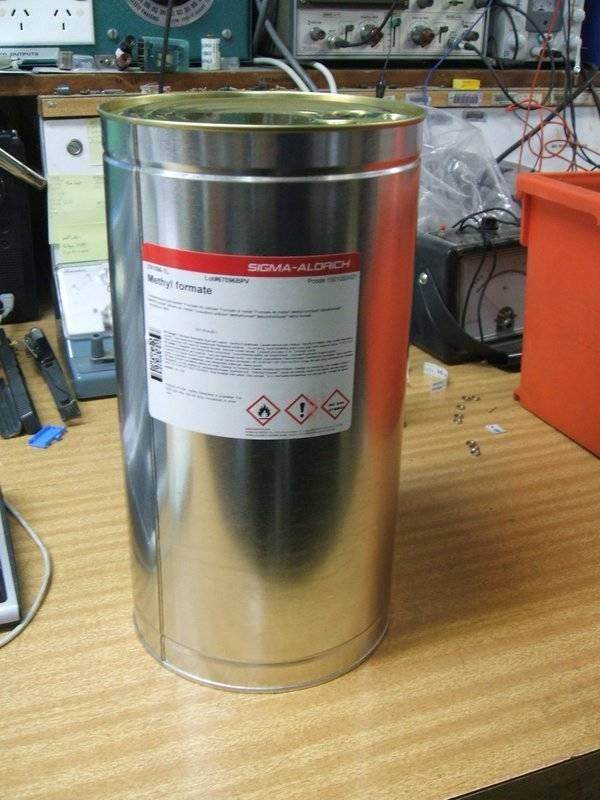
The sealed tin protects the glass bottle inside, and prevents leakage
should the bottle break.
They arrived by courier, in cardboard boxes. Inside the boxes were sealed
ring pull tins, and inside these were the glass bottles surrounded by padding.
The sealed tins were to prevent escape of the flammable liquid should
the bottles break or explode this being possible because Methyl Formate
boils at around 32 degrees C.
4.1 Testing the compressor.
So as to know all the subsequent work would not be wasted, I powered up the compressor. After cleaning a bad plug contact, it started straight away with a gentle purring sound. Having got this far, I decided to try the purging procedure, just in case that was all that was preventing refrigeration. The charge valve consists of two Bristol screws. This is accessed by removing the cap at the top of the float chamber. The top, or outer screw, is an auxiliary sealing screw. This is undone, revealing the actual sealing screw. A size .216 Bristol key is used for both. Alas, it was not just a matter of purging as there was indeed no refrigerant left, but did prove the compressor and associated low side check valve was good. As I had assumed the high side tube was the source of the leak, I concluded that the check valve and float valve were both good as the pressure remained for several weeks after testing. The compressor check valve remains closed from back pressure at the compressor inlet, and the float valve remains closed by gravity, unless there is of course liquid in the float chamber. This means that a leak between the float chamber outlet and compressor low side inlet will not cause loss of static pressure inside the compressor and condenser, if the unit is devoid of refrigerant.
4.2 Removing the evaporator.
To access the compressor wiring easily, required removal of the cabinet
top plate. A look inside revealed a lot of surface rust. Furthermore, the
wiring insulation was very poor with no insulation on part of the crankcase
heater wires. One was actually touching a copper tube. Had the fridge been
plugged into an autotransformer instead of a double wound isolating type,
it would have been a shock hazard.
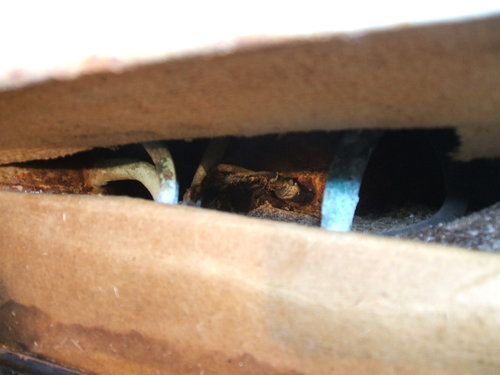
Opening the cabinet top slightly revealed surface corrosion and
wiring with crumbling insulation. A bare wire was actually touching one
of the tubes.
While the wiring could be replaced with some difficulty in situ,
the absence of refrigerant made it an easy decision to remove the cabinet
top. To do this, the high and low side evaporator connections needed to
be disconnected. These are brazed at the factory. As I discovered, it was
not simply a matter of applying a blow torch and melting the brazing. In
fact the copper tube was getting red hot without any sign of the brazing
melting.
The literature for servicing the DR units stated that one should just
cut the tubes and rejoin later on. Other information claimed that the temperature
required to melt a brazed connection is higher than that required to make
it in the first place. This confirmed having to cut the tubes.
Unfortunately, a tube cutter would not fit where I wanted to cut the
low side tube. I could cut halfway round the high side tube at least. So,
the only alternative was a Junior hacksaw with a 32 teeth per inch blade.
A problem with this is the copper shavings getting into the tubes and
later on blocking valves. My idea was to pressurise the unit and thus blow
out the shavings as I cut. Also by cutting with the cooling unit
placed on its side, the shavings would fall between the cut and largely
outside the tubes.
The high side tube was cut several inches away from the float valve
so that subsequent heat from rejoining it would not damage the valve seat.
4.3 Service valve adaptor kit.
The Schrader valve has been standard in the refrigeration industry for
a long time, but in the era of the Monitor Top, not everyone was using
it. Either I had to find an adaptor, or I would have to install a Schrader
valve in the plumbing so I could connect modern equipment. As it turned
out, adaptor kits were made, and fairly common. I bought two on eBay for
about $20 each.
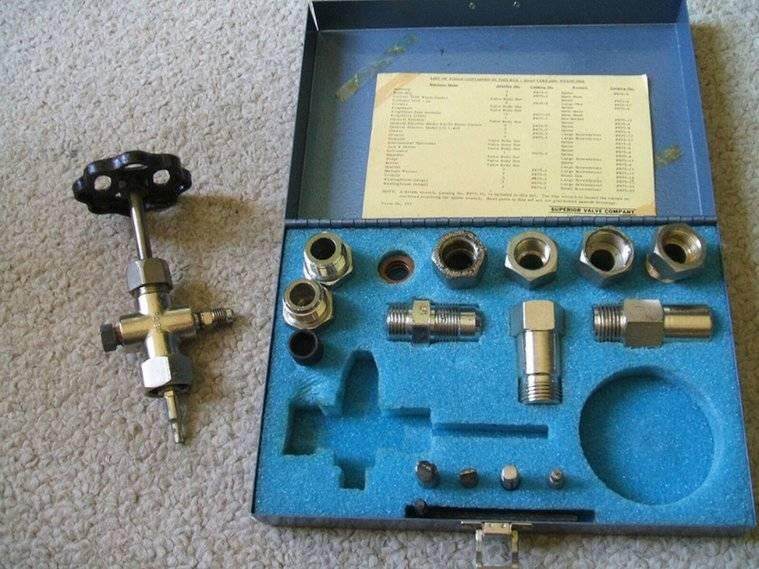
This kit adapts Schrader connections to many types of early fridge.
Searching for hermetic valve kit brought forth results. One was made by Superior Valve Company, and the other by Imperial Brass Mfg. Co. Both kits are remarkably similar. I knew they were the right kit because there is a chart which lists the models of fridge they fit. Listed was the CG (Globe Top) and associated spline key.
4.4 Charging with nitrogen.
To pressurise the unit, nitrogen can be used. It is an inert gas which
is used to clean out refrigeration systems, test for leaks, etc. Ordinary
air is not suitable as it contains moisture. This can subsequently freeze
up, blocking the system. Moisture can also react with some refrigerants
producing acid, causing internal corrosion and motor winding failure.
I fed about 20 psi into the system, enough to blow out any shavings,
but not enough to cause any stress, remembering that the low side test
pressure of the CA is 30psi.
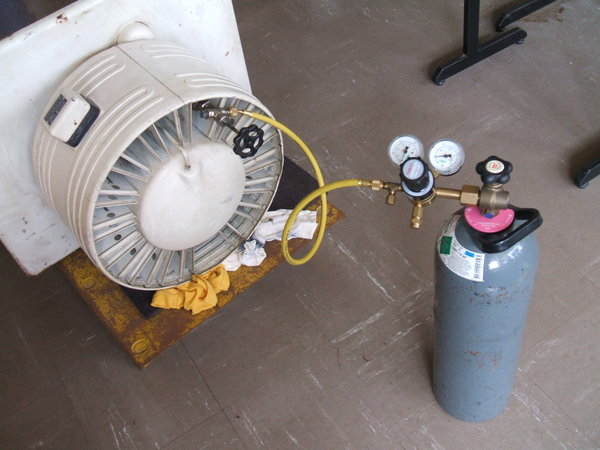
Applying 20psi of nitrogen pressurises the system before cutting the
tubes.
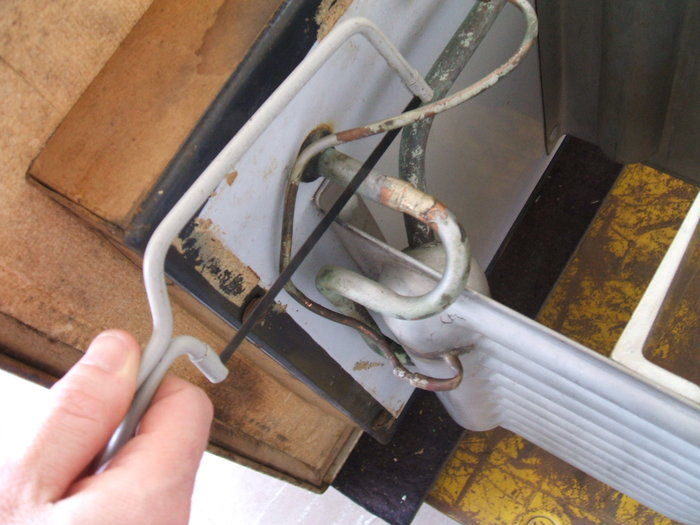
4.5 Cutting the evaporator tubes.
The cooling unit was positioned on its side, with the controls facing
down. This was so the shavings would fall in between the cut edges and
not into the tubes. To position the unit on its side, it is necessary to
place padding beneath the front of the condenser, otherwise the weight
will be on a small area which could lead to it being bent. The cooling
unit should not be inverted in case oil finds its way out of the compressor.
Upon cutting the low side tube, it was obvious my plan wouldnt work.
There was no flow from the compressor side due to the check valve, and
what I presumed was the high side tube kink prevented any flow through
the evaporator. So, I simply cut the tube and hoped none got inside. The
high side tube was easier, with a half cut possible from the tube cutter.
This time, there was a flow of nitrogen as the float valve was open by
being on its side. A small brush was used to scoop out any shavings at
the ends of the pipes. The pipe ends were also deburred.